xorkee Wand User Guide
Welcome to the xorkee Wand Help page. Find everything you want to know about how xorkee Wand works along with the screens here.
1. Download and Install xorkee Wand on your PC: (Windows)
Step 1.1. Download
To download xorkee Wand, go to the Downloads page of Odyssey and click on the Download button. Once the download is complete, double click on the downloaded file to initiate its installation.

Step 1.2. Install
Click on ‘Next’ to go ahead with the installation.

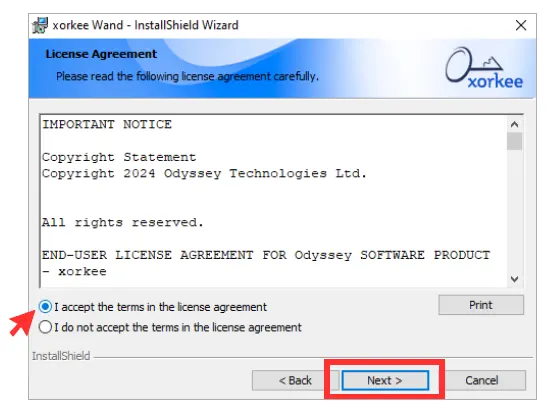
Step 1.3. License agreement
Read the license agreement and select the ‘I accept the terms in the license agreement’.
Click on ‘Next’ to proceed with the installation.
2. Setting up a Wand ID to your PC and Adding a handle:
xorkee Wand is made for a simple, zero navigation desktop signing experience where you have to simply right click on the file or folder and click on ‘Sign’ that appears under xorkee Wand’s menu.
To do so, you have to associate a handle that identifies the system as owned by that handle, referred as the Wand ID. All future signing requests from the Wand will carry this handle as the system ID to reassure the signer that he is not getting a signature request from a malicious system. Before setting this handle Wand asks for a consent signature from this handle to be treated as the owner of this instance.
2.1. Setting up a Wand ID
Right after installation, the Wand ID registration box appears*. Enter the PC owner’s handle or the handle of the person who uses the system often because Wand ID acts as the identifier to know from where the signing requests are initiated. Once you fill the Wand ID field, click on ‘Save’. A signing prompt is sent to the xorkee app. Tap/click on ‘Confirm’ to complete the Wand ID registration.

Step 2.2. Add a handle
Then you are asked to add a handle which will be used for signing the files from desktop. This handle can be changed at any time. This can also be the same as the Wand ID. Fill the field with the handle and click on ‘Add’. The handle is thereafter set as the default to sign files.
Remember that a user subscription is required to use Wand.

The difference between ‘Wand ID’ and ‘Add a handle’
Wand ID is to indicate the system a signature prompt came from, whereas the handle you add after you set up the Wand ID is the handle that is used for signing file(s).
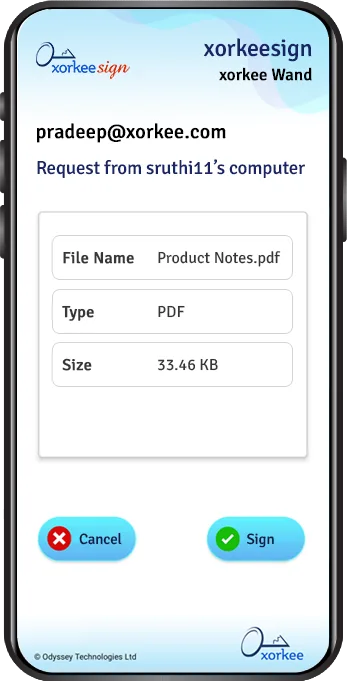
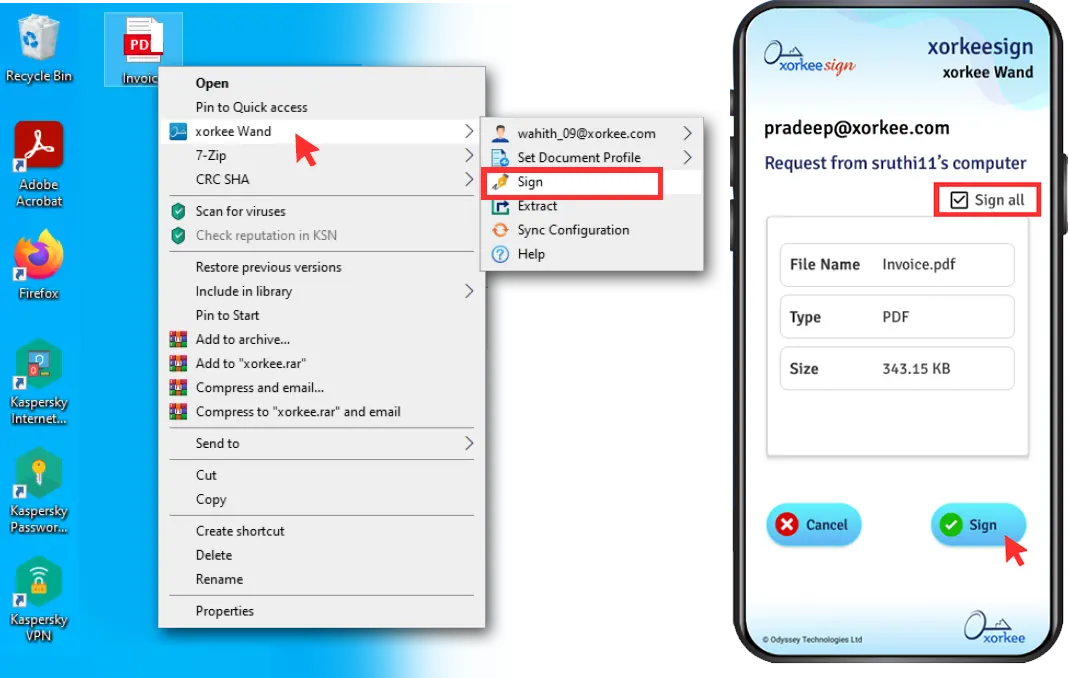
For example, if Kavya wants to sign a file on Sruthi’s PC, she right clicks on the file, enters her handle and clicks on ‘Sign’. In the prompt that she receives on her xorkee app, the app notifies the origin of the request as ‘Request from sruthi11’s computer’.
3. Sign using xorkee Wand:
3.1. Sign .pdf and .txt files
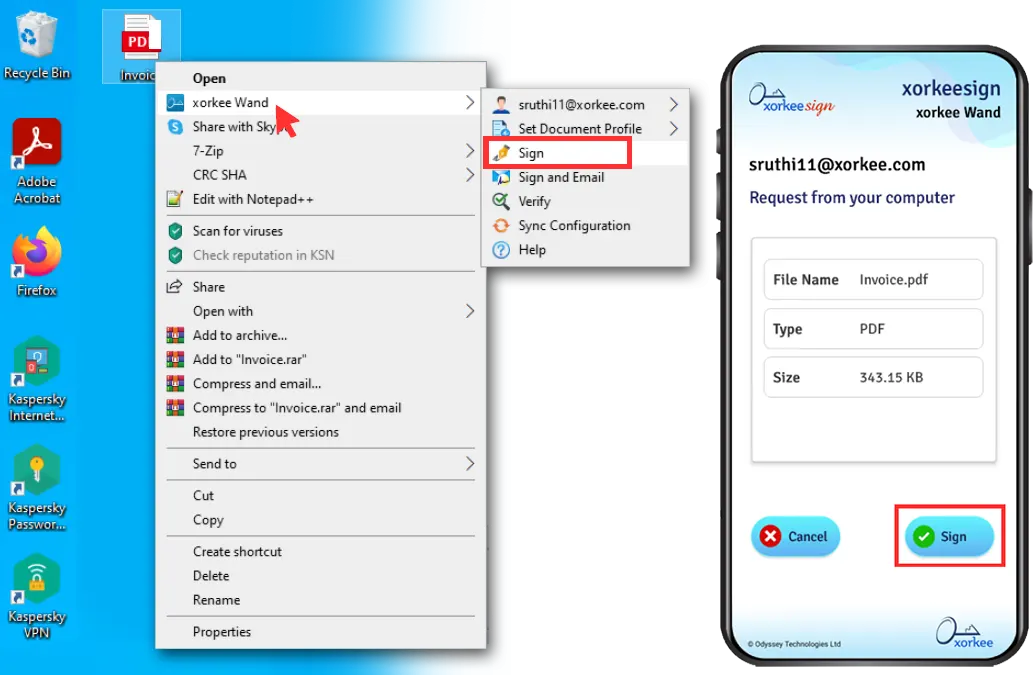
Right click on a file you want to sign, move the cursor over xorkee Wand and click on sign. A signing notification is sent to your xorkee app. Approve by tapping on ‘Sign’ and your file is signed in-place.
Wand can also sign text files by automatically converting them to PDF. The original file remains in text format without signature and the signed PDF file is saved separately in the same name with a .pdf extension.
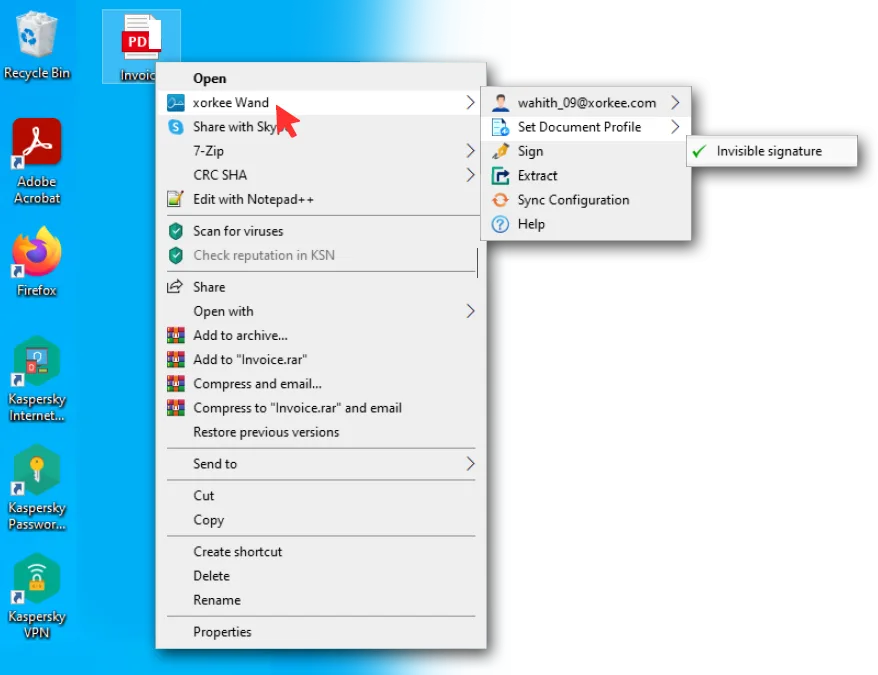
3.2. Sign a PDF file using document profile
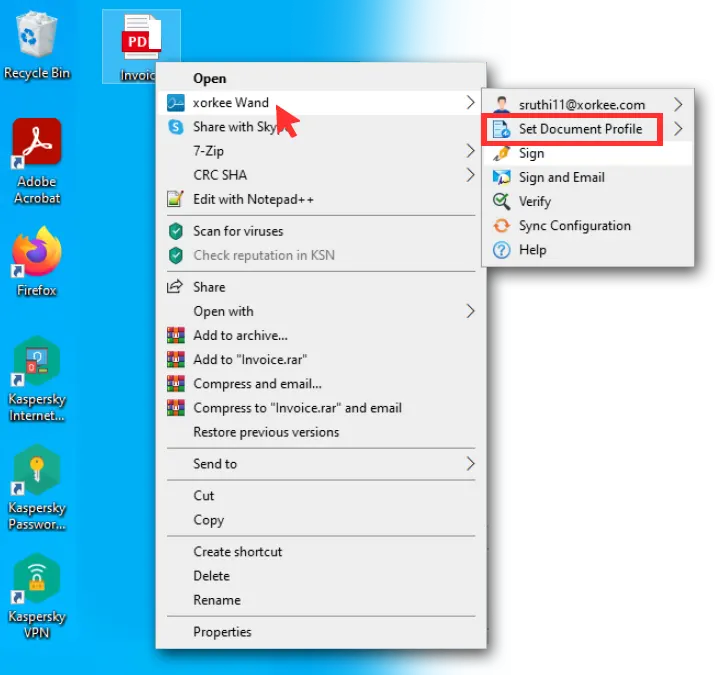
You sign several types of documents in the course of work that fit within a template - like an invoice, a medical report and so on. These need one or more signatures in specific positions and to avoid positioning the cursor each time you sign a document, you can create document profiles in your xorkeesign browser interface. Thereafter, you can apply the profile by selecting from the list under ‘Set Document Profile’ and sign documents of that type. The signature(s) will be placed in the positions specified in the profile.
If you have not created any document profiles in xorkeesign, Wand will create an invisible signature by default.
3.3. Sign files in other formats
Use xorkee Wand to sign files in other formats like xml, image files, sound files, etc. The xml files are signed in the w3c xml signature format and the others in the pkcs#7 / cms format with a .p7s extension separately without altering the original unsigned file. To sign, right click on the file, move the cursor over xorkee Wand and click on ‘Sign’. A signing notification is sent to your xorkee app. Approve by tapping on ‘Sign’ and your file is signed in-place.

3.4. Sign all files in a folder
Use Wand to sign all files in a folder at one go. Right click on a folder of files you want to sign, move the cursor over xorkee Wand and click on sign. A signing notification is sent to your xorkee app. Approve by tapping on ‘Sign’ and your files are signed and moved to a sub-folder called ‘Signed’. The original unsigned files will be moved to a sub-folder called ‘Backup’. This is useful when a signing operation stops before signing all the files. In that case, the unsigned files shall be left in the original folder and you can again right click on the same folder to sign the rest.
- Files in sub-folders will not be signed.
- You can either choose to sign all files or sign each file individually using the ‘Sign all’ check box on the signing prompt
- Text files will not be converted to PDF. The signature on text files will be in PKCS#7 format with .p7s extension
- You need a crypto token plugged into a computer(not a mobile phone) for carrying out bulk operations. Folder signing is heavy on power consumption and could drain your phone battery if you sign multiple files in one go.
4. Sign and email
Use Wand to sign and send a file over email. Make sure that you have a mail application on your system to make use of this feature. Right click on the file, move the cursor over xorkee Wand and click on ‘Sign’. A signing notification is sent to your xorkee app. Approve by tapping on ‘Sign’. Your file is signed and the signed file attached to a new mail that is opened in your default mail interface. The original file is left unsigned and in-place.

xorkee Wand notifies that your file is signed and attached
5. Verify
Use Wand to verify the signature status of a file. Right click on the file, move the cursor over xorkee Wand and click on ‘Verify’.
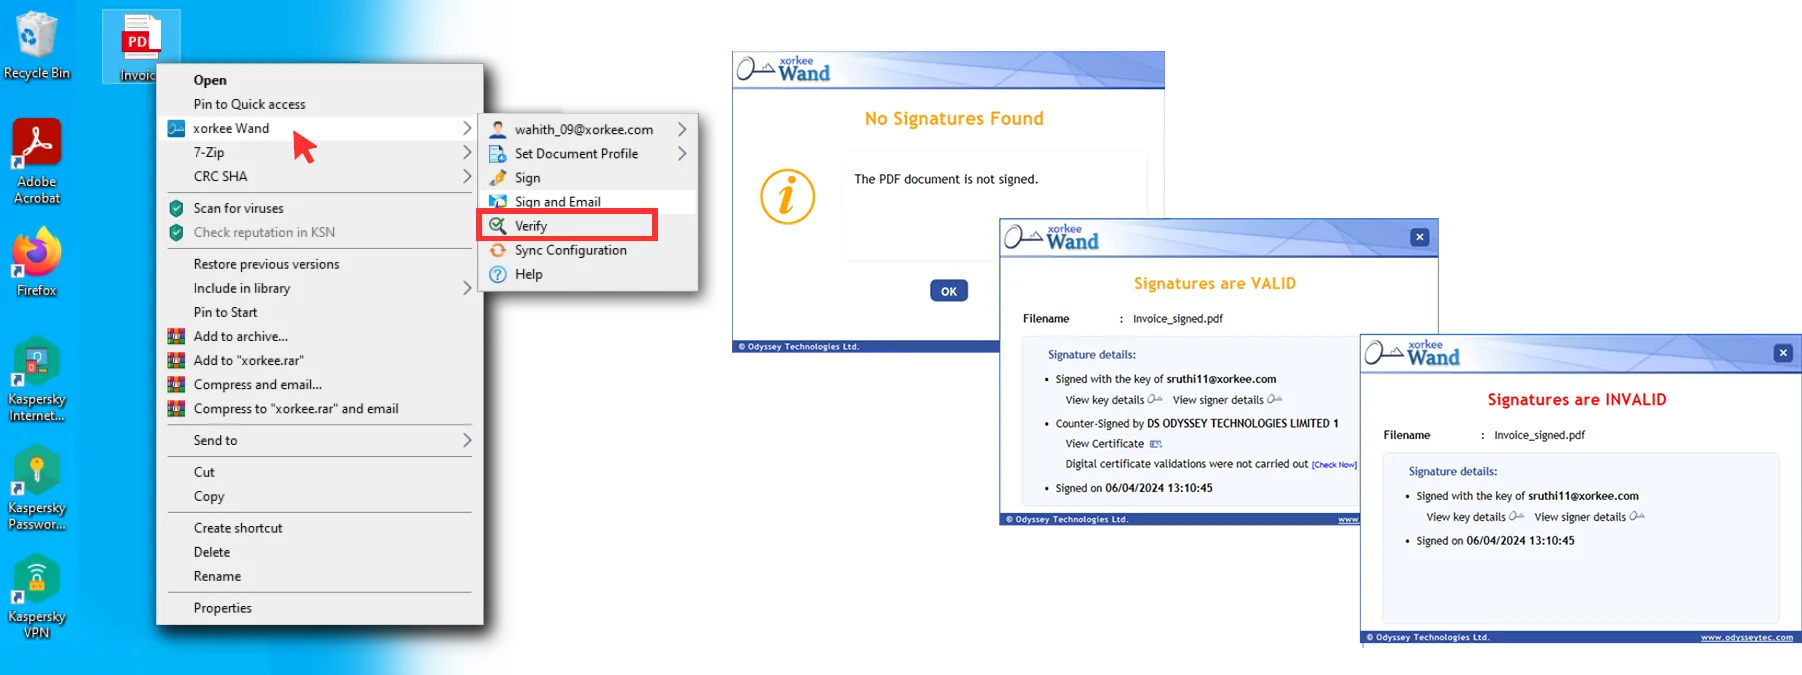
If the selected file is unsigned
If the selected file is signed
If the selected file is tampered
6. Sync Configuration
Wand uses several options that you have set in your xorkeesign interface. These options include your signature image and document profiles. To ensure that your latest changes to those options are reflected in your Wand signatures, you can use the ‘Sync Configurations’ option. This imports those configurations from xorkeesign server to the Wand instance.
